Showing posts with label food. Show all posts

16 July 2013

Adventures in Chicagoland

I like Chicago. A lot.

Here are photos from fun times in the City.


South Loop right off the Congress.


Walking up Michigan Ave-- that's Grant Park on the right.

I have so many wonderful memories from the Art Institute. I'd visit my favorite exhibits on the free days or use my student discount. #sentimental

Art Institute Lion showing some Blackhawks spirit. STANLEY CUP 2013 CHAMPIONS, baby!!!

The Best.... oh my goodness I want one this minute... Banana Cream Pie. 
Courtesy of the Grand Lux Cafe.

Asian Nachos, also courtesy of the Grand Lux Cafe. 

If you've never tried them YOU HAVEN'T LIVED.

I had to get the Sangria Tea from Argo Tea. 

Can you tell all of my favorite memories revolve around food?!

Hancock. BOOM.

The Courtyard of Fourth Presbyterian Church.

 The Sanctuary.

We also went up to Appleton for a couple days to visit The Husband's family. I didn't take photos with them because.... well... I forgot.

But I remembered to take one of my Copper Rock S'more Mocha!

Happy July! 


14 March 2013

Cheesy Veggie "Pasta" Bake

I'm going to be straight with you: this is a casserole.

However, the term "casserole" has an archaic, dated, I-refuse-to-turn-into-my-mother feel to it, so Foodies have started calling them "bakes." 

Please note: they're the same thing.

I'm hoping that in a few years, casseroles will make like the Crockpot and become "retro" so we can all be straightforward again.

Anyway, while wasting time researching recipes on Pinterest, I came across this gluten-free Cheesy Veggie "Pasta" Bake by Jenny Sugar and knew it was destiny.

Can you tell I use my stoneware dish a TON?!

Casserole-Bakes have gotten a bad rep because they're usually full of starchy pasta swimming in a sea of sodium rich, preservative laden condensed soup. Another reason why I heart this delightful dish made from simple ingredients and substitutes spaghetti squash for spaghetti.

Take heed, it's work chopping/dicing/shredding everything, but the result is worth the time. If you have a hand chopper like this one I use from Pampered Chef or are a whiz with a food processor-- I own one but I'm afraid of it-- the Cheesy Veggie Bake is a good time to utilize such tools.

From the fridge-- it tastes even better leftover!

In typical "Chef Jamie Style," I wrote "tomato" on my shopping list, even said the word "tomato" out loud in the produce section of the grocery store, yet somehow never actually bought a tomato.

Not to worry, I just added a can of petite diced tomatoes and halved the tomato sauce to balance out the liquid. In addition, I had a third of a large mozzarella block leftover from another recipe, so I diced that sucker up and mixed the small chunks in with the veggies, only using half the bag of shredded mozzarella.

The lack of spices in the ingredients list made me nervous, so I sprinkled a bunch of oregano and basil over the veggies.

Best.Idea.Ever.  24 hours later my apartment still smelled like an Italian restaurant.  

Speaking of veggies, I doubled the zucchini and chopped the carrots because I absolutely can't stand shredding them. It all worked out fine. Short on time, I totally tried cooking the spaghetti squash in the microwave even though I scoffed at Jenny Sugar's claim that it would actually cook in 8-12 minutes. It really did cook! Seriously, I will be making way more spaghetti squash now that I know I can just microwave that sucker.

It's incredible and a great way to get kids to eat their veggies. It makes a great meal or side dish; next time I'm throwing in a pound of ground turkey/beef/pork (whatever's on sale) and an onion to really make this a main dish.

All in all-- you should make this. Normally the word "should" is considered bossy, but I'm bossing you around and commanding you to try this.


*Please note, the recipe below reflects my alterations, but you can find the original via the link at the top of the blog post.

Gluten-Free Cheesy Veggie "Pasta" Bake

Ingredients

1 whole spaghetti squash
2 tbsp olive oil
2 zucchini, diced
1 carrot, chopped 
1 red pepper, chopped
4 cloves garlic, minced
1 1/2 tsp dried oregano (to taste)
1 1/2 tsp dried basil (to taste)
12oz can petite diced tomatoes, drained 
8oz can tomato sauce
1/4 to 1/2 cup grated parmesan cheese
12oz bag shredded mozzarella

Preheat the oven to 350 degrees. 

Pierce spaghetti squash all over with a sharp knife, place in a microwave safe dish, and cook for 8-12 minutes until soft. If you don't have a microwave, you can bake the pierced squash for 45-60 minutes at 375 degrees. 

When cooked, slice squash in half length-wise, scoop out seeds, and use a fork to flake off the flesh from the peel so it resembles spaghetti. It should come off easily. Place flesh in ungreased 9x13 baking dish.

While the squash cooks, heat olive oil, carrots, zucchini, garlic, and red pepper in a skillet over medium heat. Cook until soft, about 10 minutes, then add vegetables to the squash. Toss in the tomatoes, sauce, spices, and half the cheese and mix well. Sprinkle the remainder of the cheese over the top.

Bake for 30 minutes or until the cheese is bubbly. Let stand for 5 once finished baking. Enjoy!

Substitutions and Add-ons

To make this a heartier main dish, add a pound of ground meat of your choice and toss in a 1 medium yellow onion for flavor. If you decide to do this, here are the instructions: 
  • Brown the meat, onion, and garlic together in a large skillet. Drain fat. Add the tomato sauce and spices to the meat mixture and simmer for 3 minutes. Place in 9x13 dish. Wipe the skillet clean and reuse for the rest of the veggies.
If you want added protein but don't want to use meat, add 2 cups of cooked quinoa.

For a creamier, cheesier casserole, mix in 1/2 to 1 cup ricotta cheese instead of the mozzarella. I'd increase the spices too if you do this.

Substitute yellow or Mexican squash for the zucchini.

Substitute 1 tomato, diced for the can of diced tomatoes. If you do this, you'll need 16oz of tomato sauce.

To make this even easier, skip the onion, garlic, tomato sauce, and spices and substitute with 16oz of your favorite marinara sauce.

You can use any color pepper you want.

If you'd like to see more of the recipes I love on Pinterest, follow me here.

22 February 2013

Primal Fudge and Accidental Banana Bites

It would be easy to go all "dramatic" on ya and say fudge is "the best thing ever," but let's be serious: there are plenty of things better than fudge. Love, Disney, a Burberry bag, sex. All better than fudge. 

However, fudge makes the things that are better... better. Does that make sense? Probably not so let's look at the numbers.

Love + Fudge = better
Disney + Fudge = better
Burberry + Fudge = better
Sex + Fudge = XXX

See what I mean? Math makes the world go round. Only... real, sugar packed fudge hurts my teeth and my waistline. Fortunately, I found this super easy Primal Fudge recipe just chillin' out on Pinterest and thought I'd give it a try since I had the ingredients.

I used natural peanut butter instead of almond maybe because I had 3 different open jars of it in the apartment.... don't judge.

Beautiful, isn't it?

Let it be known this was my second attempt at making the fudge. The first time I got a bit... arrogant and thought I wouldn't need muffin papers and scooped the soft chocolate into my mini-muffin tin to make baby primal fudge "cups." Not only did they all fall apart, but the tin was also a pain in the ass to clean.  I'm talking 10 minutes standing over a sink full of dark brown water. Ew.

I've said it before and I'll say it again: learn from me.

The second time around I used an 8x8 pan lined with wax paper. I spread the chocolate evenly, froze it for 10 minutes then cut a bunch of uneven rectangular pieces. I think the next time I make this (and there will be a million more "next times"), I'll precut pieces by using a knife in the soft fudge. 


During my first attempt, I had a bunch of leftover soft chocolate. Feeling creative-- and a little sassy-- I cut 2 bananas into big chunks and used a toothpick to coat them in the fudge. Then I covered them in shredded coconut I'd bought on one of my more whimsical days and created frozen peanut butter chocolate coconut banana bites. (Ideas for a shorter name are welcome)


If you love the unbeatable combo of peanut butter, chocolate, and banana make a double batch of the fudge, pick up a bunch of bananas, and go crazy. If you use almond, cashew, or especially hazelnut butter, might I suggest trying it out on strawberries?

This is such a versatile, superbly easy little fudge recipe that even if you're not doing the Paleo thing, I promise you and your kids will love love love it. The best part? There's no "cooking" required. Now go satisfy your chocolate craving!

Primal Fudge

1/2 cup coconut oil
1/2 cup cocoa powder
1/2 cup smooth nut butter 
1/4 raw honey or high quality maple syrup (I used Archer Farms Grade A)
1/2 tsp vanilla (I used organic)

Melt the coconut oil. Blend all ingredients together in a food processor or blender. Pour into paper-lined muffin tin cups, silicon muffin cups, or spread in a paper-lined 8x8 pan. If using muffin tins, fill each cup 1/2-inch full. If using a pan, trace squares in the chocolate for easier cutting. 

Chill for 30 minutes or freeze for 10 minutes. When firm, remove and cut if necessary. Store in air tight container in the fridge or freezer.

For the Banana Chunks

After making the fudge, cut bananas* into 1 inch pieces. Using a toothpick (or fork if you don't have any), roll each chunk in chocolate mixture until coated. Then cover each piece with shredded coconut** and place on a baking pan or dish lined with wax paper.

Once all the pieces are finished, place in freeze for 10-20 minutes until hardened. Store in an air tight container in the freezer ONLY. 

* I used 2 bananas for about half the batch, so for a whole batch you'll need 4-6.

**If you don't like or have an allergy to coconut, you can leave the banana pieces plain OR add a chopped nut of your choice for a little crunch. The frozen bananas at fairs have peanuts.


Thanks to Practical Paleo for sharing this recipe! For more amazing whole food recipes and how to shop Paleo at commercial grocers, check out her blog here.


20 February 2013

Mustard Glazed Chicken Thighs and Sweet & Savory Potatoes

For the safety of myself, my husband, the cats, and all of Los Angeles, it's best if I keep cooking as simple as possible. Not only will I not accidentally blow us up, there's also a good chance I won't have an(other) emotional breakdown about being a culinary failure.

I have Perfectionist issues.

Fortunately, Practical Paleo takes into account that even though some of us want to be healthy, some of us should also spend as little time in the kitchen as possible.  And since I'm a Chicken Whisperer, these mustard glazed chicken thighs just. made. sense.


Since I apparently shop in The Twilight Zone, the grocer didn't have bone-in/skin-on thighs so I settled for meat only chicken thighs. If you also shop in another dimension, shorten the cooking time and keep an eye (maybe two) on the meat.

Living dangerously, I decided to cook sweet & savory potatoes as a side dish:


It's a good thing these are delicious since I ate them for the next 3 days.

The mustard glaze would also go great on white fish, pork, and a whole roasting chicken, plus you can experiment with various mustards to change the flavor while the sweet potatoes-- since they require cinnamon-- would be great with breakfast or dinner. Diversity is key, my friends.


Seriously, one of the best dishes I've made.

Mustard Glazed Chicken Thighs

12 bone in/skin on chicken thighs*
1/4 cup melted butter or coconut oil
2 Tbsp gluten-free mustard (or reg if you don't have a preference)
Black pepper to taste
1/2 tsp sea salt
1/2 tsp dried sage

Preheat ove to 425 degrees.

In a small mixing bowl, combine melted butter, mustard, black pepper, sage, and salt. Place thighs on a baking sheet or oven safe dish, and brush the mixture evenly over each one. 

Bake for 45 minutes or until a thermometer reads 165 degrees when inserted into the center of the chicken thighs.

*You can also use bone-in/skin-on chicken breasts

Sweet & Savory Potatoes

2 large sweet potatoes
1 tsp duck or bacon fat, melted, or coconut oil (I used coconut oil)
1/4 tsp onion powder
1/4 tsp garlic powder
1/2 tsp cinnamon
Sea Salt and Black Pepper to taste

Preheat oven to 375 degrees.

Peel the sweet potatoes and chop them into 1 inch pieces. In a medium sized mixing bowl, toss the sweet potato pieces with your fat of choice, coating them evenly.

In a small mixing bowl, combine spices. Add spice blend to the sweet potatoes and toss again to spread spices evenly. Place potatoes evenly on baking sheet and bake for approximately 30 minutes or until potatoes are fork tender.


06 February 2013

Cumin Spiced Pork Tenderloin with Veggies

I never know what to do with coriander-- it's not a common spice in every day cooking (for me, anyway). When I tried an Indian recipe several months ago, I had to purchase a bottle of it, so ever since then I keep my eyes open for more ways to use it.


By chance, I opened my paleo cookbook simply to find a pork tenderloin baking time and stumbled upon this recipe. Weirdly, I had all the ingredients excluding the parsnips for which I substituted another root vegetable: carrots. Isn't it colorful?!


While this is technically a paleo recipe, it's just good no matter what health regime you follow (provided you eat meat). And even with chopping the veggies, it's pretty quick to throw together.


Cumin Spiced Pork Tenderloin with Veggies

2 onions, sliced
4 carrots, cut into sticks
1/4 cup pomegranate seeds
1 large orange, peeled & segmented
2 garlic cloves, smashed
2 pork tenderloins
2 Tbsp bacon fat (or other cooking fat-- I used butter)
1 Tbsp cumin
1 Tbsp coriander
1 Tbsp garlic powder
1 tsp sea salt
Black Pepper to taste

Preheat oven to 375 degrees.

In a small mixing bowl combine cumin, coriander, garlic power, salt, and pepper. Using paper towels, pat down the tenderloins 'til dry and apply spice blend generously to create a crust. Heat a large skillet over medium-high heat and sear pork on all sides for about 2 minutes per side.

Place vegetables and fruit on the bottom of a large roasting dish, topped with the tenderloins. Roast for 30-40 minutes or until the internal temperature of the pork reaches 145 degrees. If you need to continue to roast the produce until they are soft, remove the pork and roast for another 10-15 minutes until soft.

Slice on the bias and serve over the veggies.

25 January 2013

Baked (or Roasted) Chicken

According to cooking experts-- also known as "chefs"-- the true "tell" of a great cook is how well they roast a chicken.  Seriously... I read that somewhere. It's not as simple a task as it sounds-- trust me. Are the white AND dark meats moist but not undercooked? Is the skin crispy with a light brown tint?! Did you use the correct seasonings in the correct amounts?!?!

Lucky for you, I'm a Chicken Whisperer.

Growing up, I ate baked chicken A LOT.  Both of my parents worked at our church-- my dad as the choir director and my mom as the accompanist-- so during the school year, Wednesdays consisted of school, homework, children's choir, home for dinner, back to church to do homework while my parents rehearsed Senior Choir, then home to bed. When I entered junior high, children's choir ended just in time for youth group and 2 years of Confirmation.... yay. Then I matured to high school and joined adult handbells, Senior Choir, and directed the Children's Chime Choir for three years (OMG guys, are you impressed?!?!).

Like I said, we ate baked chicken a lot, especially on Wednesdays.

While I love my mother deeply-- I think it's safe to say we're besties-- her chicken was D-R-Y.  Don't worry guys, I'd never tell you anything about her I couldn't say to her face (and in this case already have-- love you Mom!). My scarred childhood of dry chicken left my badass adult self with two major life choices: never bake chicken again or bake the best damn chicken this side of the Mississippi! 

So here we are today: you wondering why I droned on about a lame chicken story and me about to share my secrets to great chicken.

The photos I have for you are an example of Baked Chicken, but I also use a roasting pan when I'm feeling saucy.


For this guy, I used my Pampered Chef Stoneware Deep Covered Baker. It's a great kitchen piece, and you can even cook a whole chicken in ten minutes using your microwave, but for the best results, take your time. 
There was plenty of room as the chicken was only 2 pounds, so I threw in veggies to take care of a side dish. Doesn't he look cozy? 


You might be wondering what's sticking out of the cavity or what spices I've used-- an excellent question. I first begin the process by crushing a glove of garlic and rubbing it all over the skin (top AND bottom). Then I surround the chicken with veggies and squeeze fresh lemon juice over everything (don't forget to get some underneath). After the lemon, I rub the chicken in quality olive oil and sprinkle a bit more over the vegetables. Place a couple garlic cloves, an onion wedge, and a lemon piece inside the cavity for moisture. You can also use apple pieces.

The best thing about poultry is the meat's flavor adaptability-- try various kinds of spice combinations until you find one you love.  If you're ever stumped, refer back to Simon & Garfunkel's Scarborough Fair.


Just add a salad and voila: a beautiful paleo meal!  It's easy, low maintenance, and utterly satisfying. Be sure to save the bones to make broth.  I hope you give this recipe a try-- it's perfect for dinner parties!

If you're also a Chicken Whisperer and have your own signature chicken recipe, send it my way-- I love to try new recipes! 

Baked Chicken

Serves 2-4 people

Ingredients

1 whole chicken, 2-2.5 pounds
3 garlic cloves, crushed
1/2 lemon, cut into 2 wedges
1-2 Tbsp olive oil (or melted coconut oil) plus a little extra
1/2 tsp dried sage
1 tsp dried thyme
2 tsp dried rosemary
2 tsp parsley
Salt & Pepper to taste

2 carrots, cut into 2 inch sticks
1 yellow onion, cut into 6-8 wedges

Directions

Rub chicken with garlic, place in Deep Covered Baker (a Dutch oven or deep casserole dish will work), and surround with onions and carrots.  Squeeze juice from 1 lemon wedge over chicken and veggies, then rub the chicken all over with olive oil, sprinkling the veggies with some as well.  Sprinkle the chicken with spices.

As I said above: "Place a couple garlic cloves, an onion wedge, and a lemon piece inside the cavity for moisture. You can also use apple pieces."

After baking your chicken covered for an hour at 375 degrees (for a 2-2.5lb bird, you can find a chart of times & weights here), remove lid and put the baker back in the over for another ten minutes to crisp the skin. If your veggies are still underdone, remove the chicken and let them cook another 10 to 15 minutes until fork tender. (The temperature of the meat should be at 165 degrees)

Carve, serve, enjoy!

Hodge Podge Tips
  • If you like using PSRT, feel free to alter the amounts to your taste. 
  • You can use whatever sturdy roasting vegetables you want. I'd recommend any root vegetables cut up similarly to the carrots so they cook, or you can toss in brussels sprouts, potato wedges (if not doing Paleo), broccoli, cauliflower, etc.


30 November 2012

Chili Dip (not poop)

Chili Dip is fantastic. 

These pictures make it look like orange diarrhea, but I assure you, the taste is far better. Not that I know what diarrhea tastes like....... you know what I mean.


The best part? It couldn't be easier or less healthy for you!!! So save Chili Dip for a special treat, holiday party, or when you have "The Munchies."

Chili Dip

1 block of regular cream cheese
1 can Hormel Chili (NO BEANS), beef or turkey is fine
Bag of Corn Chips

Toss the cream cheese and the chili into a pot. Heat over medium heat and stir until well blended. Serve with corn chips.

Some Tips--

Cut the cream cheese into chunks before tossing into the pot-- it melts faster.

While the "third less fat" cream cheese may sound like a good idea, read the ingredients. There are more hard-to-pronounce chemicals in that kind than the regular cream cheese, but I've used it and it works just as well.

"Chili" and "Chili Beans" are NOT the same thing. Trust me.

Make sure you remember where you put the extra can of turkey chili so you don't have to run out a THIRD TIME for more................


27 November 2012

Homemade Whipped Cream

Honestly, I can't believe how many years and how much money I wasted on crappy  mediocre Cool Whip or Redi-Whip. I mean, making whipped cream is SO DARN EASY!

The consistency has the thickness of Cool Whip, but it does tend to lose it's form quickly. Of course, you just need to pull out the old mixer again, otherwise make just enough of what you need that day and use it up.

Isn't it beautiful?

Because many of us are used to the chemically sweetened kind, this whipped cream recipe won't taste as sweet, but you could always toss in extra powdered sugar.


I never realized the many uses of whipped cream: toss it on pies, cakes, cupcakes, cocoa, cider, and even coffee! Plus, you can add a 1/2 tsp of bourbon or liqueur per cup of whipping cream used to make your own special flavor. Next time I want to try sweetening it with agave nectar.

Seriously, make fresh whipped cream-- you're putting less crap into your system, you'll feel an amazing sense of accomplishment, and your guests will think you're Martha Stewart! (unless one of your guests is Martha Stewart...)

Homemade Whipped Cream

1 cup whipping cream or heavy cream 
2 Tbsp Confectioner's (powdered) sugar 

Chill a metal or glass bowl and mixer attachments. Once chilled, add cold whipping and sugar to the bowl. Beat on medium speed (I used Level 3 on my cheap-o hand mixer) until the cream forms peaks.... then beat a little more to make sure it holds. Refrigerate until ready to serve.


Some Tips--

Do NOT get anything low fat, you need a high fat content so the cream will solidify.

Granulated sugar won't work as it won't dissolve. If you don't have powdered sugar or all the stores in your area are out for some reason, you could make a simple syrup-- one part sugar, one part water, boil until sugar is dissolved (5 min) and chill for a few hours-- and add 1/2 to 1 tsp, maybe 2. The same measurement should work for agave nectar, but I haven't tested it yet. 

If you decide to use a liquid sweetener, no matter what kind it is, use less than what's needed for the powdered sugar, otherwise your whipped cream won't solidify.

You could add cinnamon or pumpkin pie spice for added flavor.


**This recipe comes from Food Network Magazine. Consider it TESTED and APPROVED!**


12 November 2012

Food, Glorious Food!

As I've mentioned before, my husband and I LOVE food. So much so that I'm becoming one of those people that needs to photograph every dish ordered at every meal. 

I promise I'll try to stop it. 

For our "6th year of being together" Anniversary, we ate at a local sushi joint in Glendale: Octopus. In the past we've celebrated at Cheesecake Factory because that's where our first date in Chicago took place.
Geisha Punch and a Side Salad that's incredible.

Michael and I had known each other for a year before dating. We met at Bible Study in college during my sophomore year, his freshman year. Michael went to school later in life since he was the drummer of a band signed to a label & toured right after high school. I know-- sexy.

He was quiet and serious, I was oblivious and absorbed in studies.

Miso Soup and Tempura Shrimp with jalapeno cilantro sauce.

After receiving an invite to his surprise birthday party upon entering my junior/his sophomore year, we connected and I saw the funny, playful side of Michael.

We split a Tomikawa Deluxe Entree: Chicken Teriyaki, Shrimp & Veggie Tempura, Sesame Chicken, edamame, cucumber salad, Spicy Tuna Roll, and assorted Sashimi.

After the party, Michael called me up and invited me to his apartment for coffee, to watch movies with friends, and lent me a CD of his music in the band. 

To be continued....

Another great restaurant, though a bit Hipster, is the Viet Noodle Bar in downtown Atwater. We decided a Vietnamese breakfast and coffee would hit the spot. The food is unbelievable.

Vietnamese Coffee (best on the planet) and a Rice Noodle Omelette.

Michael hung out in my dorm one afternoon, we talked, laughed, and had a great time. I thought we were good friends, but my roommate-- bright gal that she is-- insisted he liked me.

Seed. Planted.

Turmeric Fish and Rice Noodles

After Campus Crusade's Friday night service... thing, a group of us went to Michael and his roommates' place. I cannot confirm nor deny that I did a little flirting and wore a short skirt. 

He asked to get together on Sat., Oct. 29th-- but I said no. 

What? I had a Halloween party to attend!

Jackfruit Noodles with Tofu & Peanut Sauce.

I was planning a group trip to evening church on Sunday night the 30th and Michael showed up an hour early. He suggested we go get dinner. I thought that was odd since we'd be late for church...............................................................................................................................................................................................................................................................................then I realized it was a date.

I'm not sure what came over me, but I called a friend and had her take over the field trip. Michael took me to the Cheesecake Factory at the base of the Hancock building and literally put down his menu, looked me in the eyes, and said "I like you. I want to date you. And I don't want to date anyone else."

I thought that sounded like a good idea.

31 October 2012

Food Adventures in Atwater

Temperatures turned cold last week-- in LA terms "cold" means "the 60's"-- and while these frigid fall days cause many Southern Californians to bundle up and take shelter, Michael and I emerged from the safety of our air conditioned apartment to take long walks over to downtown Atwater Village.

To illustrate how long it's been since we visited that part of our neighborhood, we went to this brand new restaurant (at least we thought it was new) and it turned out they'd been serving the citizens of Los Angeles for at least the last 3 months. What can I say, we don't like warm weather.

That restaurant was Bon Vivant, a quaint market/cafe/restaurant with a French-inspired menu featuring impressive cuisine. I, of course, knew none of this and just thought the place looked pretty so it must be safe to eat at right?!?! Fortunately, the food is TO-DIE-FOR and, in traditional California fashion, made of fresh local ingredients. The mediocre desserts come from a shop in Culver City so I won't count them against BV.  Also, they have almond milk for every manner of latte you desire! 

Check out my stereotypical food pictures:

Smoked Duck Salad with cucumbers, mango, oranges, and a light vinaigrette.

 
Double Shot Almond Milk Caramel Latte and the Duck Egg Burger (so messy but soooo tasty)

 
The place has a cool barn feeling with incredible Halloween decor.

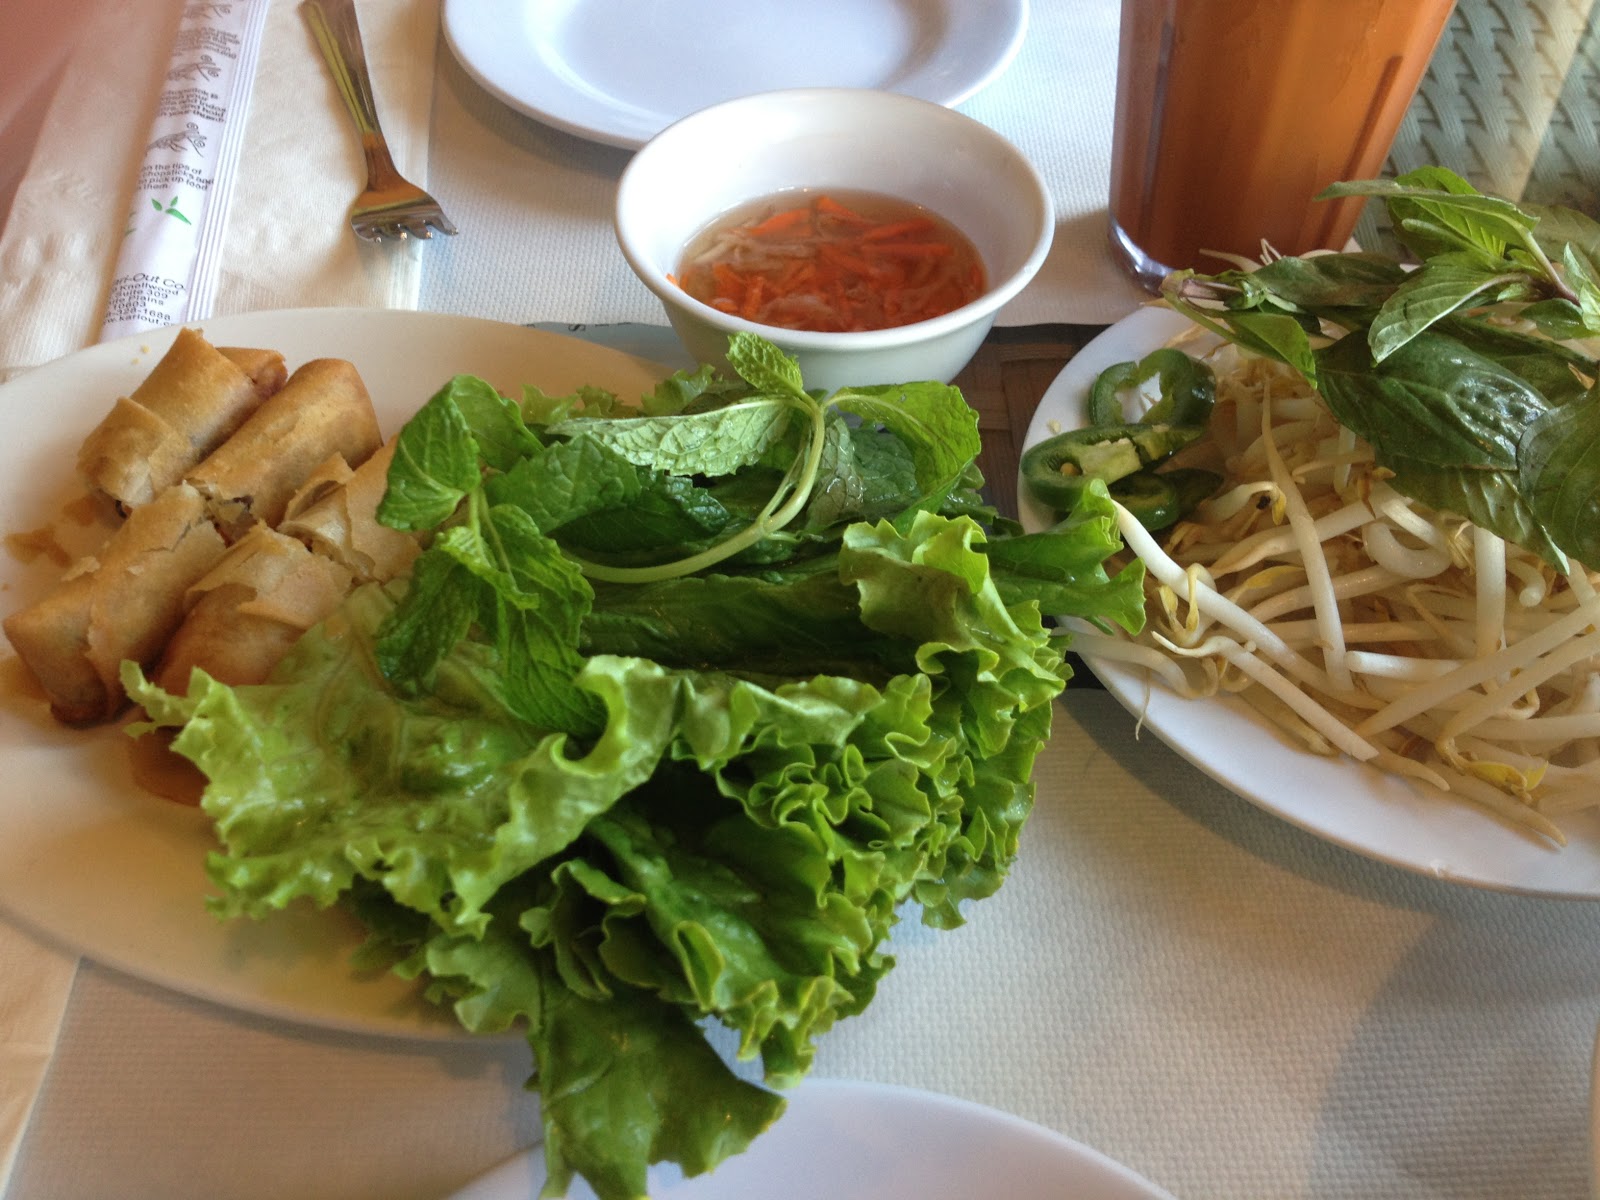
Since we moved to LA, I've wanted to try Indochine Vietnamese cafe conveniently located across the street from Bon Vivant. Atwater is a plethora of International Cuisine! 

Anyway, this was my first time trying Vietnamese food and I was not only impressed with the flavors, but also the price. Another excellent find.

Left: Black Thai Iced Tea which might as well be crack as it's so good. Right: Shrimp and Chicken egg rolls.

Pho Tai - beef and rice noodle soup (it's HUGE)

Pho Bo Xao-- basically it reminded me of Pad Thai. It wasn't on their normal menu, it was a special.

Finally, we headed over to Sweets for the Soul, a tiny bakery two doors down from Bon Vivant, for their legendary iced shortbread cookies. The cookies are buttery & crumbly complimented nicely with an icing that I believe (though it hasn't been confirmed) has almond extract.

While the iced cookie is worth $3.25, in my humble opinion, the rest of the goodies don't live up to the steep price tags, especially given the portion size but also the flavor. They're just not that good.

Perhaps I'm being picky because I come from a bakery family, but I still haven't found a solid bakery in LA. What's also frustrating is they require a $10 minimum on credit card purchases, so you must have cash if you want to pop in an grab a small treat. Annoying. And the customer service isn't great..... but I will forgo all of that for those cookies-- I'm HOOKED!

My pumpkin has a mustache.

I suppose I should get back to cooking... but can you blame me for dining out with these restaurants nearby?!

06 October 2012

Jambalaya (and my review for "Slow Cookers for Dummies")

This is a two-part blog, the first being a review for "Slow Cookers for Dummies" and the second is my recipe for Jambalaya that I adapted from SCFD (hence the review). So there.

Slow Cookers for Dummies

After expressing my dire need for a more current slow cooker book, my wonderful mother-in-law sent me this book full of slow cooking tips, tricks, and recipes. As I am not a "slow cooking dummy," I'm going to be honest: I have not read the text book information on crockpots and how they work. There could be oodles of slow cooking secrets hidden within the pages of endless text, but as to what they are, I am clueless.

One of my weaknesses My ONLY weakness in this world is that I do not learn well through reading; put another way, I learn best visually (pictures!) and kinetically (aka by doing it). Sadly, SCFD doesn't have pictures. 

Sidebar: I think all cookbooks should have pictures of EVERY RECIPE! I want to know if that casserole I made is supposed to look like sewage.

Thus, I jumped into the recipe section and started guessing what might taste good. So far, I've made an excellent vegetarian chili that I forgot to photograph and probably won't make again because my husband doesn't like all the beans that make him (us) gassy. I must say, bean farts are really painful-- you know you were thinking it! And I also made Jambalaya.

My one MAJOR complaint about the recipes in "SCFD is that each recipe requiring vegetables (onions, peppers, garlic) directs that you sauté everything first. The whole point of a slow cooker is to save time and effort by slowly cooking your food! Which makes me wonder if "Slow Cookers for Dummies" was actually written by dummies.

On the plus side-- the food is great. With a little tweaking, I've got a great selection of current dishes to make and serve in my crockpot.

Jambalaya

For whatever reason, I occasionally crave New Orleans style cuisine even though I've never been there. Jambalaya is at the top of that list because I happen to love spicy sausage, shrimp, and peppers. 


If you frequent or are from New Orleans, you'll probably eat this and say "What the fuck?!" but for those of us who just love tomatoes, sausage, shrimp, and spices, it's delicious. This isn't the exact recipe from the book: I changed a few ingredients and a bit of the process, but the overall result was delicious. Enjoy!

1 lb. pre-cooked and deveined shrimp, tails removed
12oz pkg fully cooked andouille chicken or chicken apple sausage, diced
1 green pepper, chopped
1 large onion, chopped
2 stalks celery, chopped
3 cloves garlic, minced
1 Tbsp parsley
1 tsp thyme
1/2 tsp kosher salt
1/4 freshly ground pepper
Hot Sauce (I used Sriracha because it's what I had) 
28oz can crushed tomatoes
1 cup instant rice

Combine everything but the shrimp in your slow cooker. Cook on Low for 3 hours. Once cooked, add the shrimp and cook 20 minutes more until shrimp is pink. Serve.

Tips
  •  I suggest buying a 1 lb. bag of frozen shrimp to save $$$
  • When choosing a hot sauce, pick what you like and choose whatever level of spice you want. If you're not sure, start with 1 teaspoon.
  • If you're not a fan of instant rice, omit the rice from the slow cooker. Cook the rice to package directions on the stove or with a rice cooker and add it to jambalaya when you add the shrimp.


01 October 2012

Chicken Salad

For some unearthly reason, it's still stupidly hot in Los Angeles (100 degrees on October 1st? F**k me.) so I'm not cooking at all much. Not only does cooking require heat (duh) but the actual act also makes me warm. Blah. So chicken salad it is!!

In my extensive years as Someone-Who-Eats-Food, I've noticed there are two types of chicken salad: sweet and savory. I have a recipe for each, my sweet chicken salad recipe practically an exact copy of the Corner Bakery version. However, this is the savory one.

Super delicious as a sandwich...

To make this recipe (or any chicken salad recipe) even easier, skip the whole cooking chicken breasts/ boiling a chicken thing and just pick up an already roasted chicken at the grocer. It also saves on the heat and energy use at your place. Unless you're also making soup that requires broth: parboil a raw roasting chicken and BOOM! The liquid is automatic broth. You're welcome.

If your store has "flavored" chickens-- bbq, smokey, lemon & olive oil-- and hardly ever has plain like mine, go with something using rosemary, thyme, lemon, or olive oil. It adds a little extra zest to the salad too.

...or by itself.

Yes... I used mayo. Smart Balance Mayo since that's what was left in my fridge. And I just read that SB isn't so smart. Mayo is from the devil. Blah blah blah-- I'm not going to apologize anymore! I keep trying and changing my ways, but if I want to use mayo in my chicken salad then dammit-- I will! While Greek yogurt is great for sweeter versions, I don't think it would mix well with the green olives in this one. Same goes with Miracle Whip.

One final note: the problem with this recipe-- adapted from my mom-- is that I "eyeball" everything. So you might need to do a little tweaking to get the consistency just right... but hey, it's a great way to get the creative culinary juices flowing, right? RIGHT?!

Savory Chicken Salad

1 whole roasted chicken OR 3 chicken breasts parboiled OR 1 raw roasting chicken parboiled, remove skin, de-bone, and shred the meat
1 to 2 celery stalks, chopped fine
1/8 onion, chopped fine (optional)
1 cup small pimento stuffed green olives, sliced
2 to 3 Tbsp green olive juice
1 to 1-1/4 cups mayo (basically figure out how creamy you like it and go with that)
Fresh ground pepper & salt to taste

Put chicken, onion, celery, olives, salt, pepper, and olive juice into a medium bowl and mix well. Add mayo and stir until everything is well-coated. Let sit in the refrigerator for one hour. Serve plain or as a sandwich.